Showing posts with label thrift. Show all posts

Tuesday, May 10, 2011

New Cloth Diapers: BumGenius 4.0

Our latest addition to the cloth diaper "stash" arrived today! Six BumGenius 4.0 Snaps in Ribbit from Nicki's Diapers. I was so excited when they came that I rushed them into the wash and dryer so we could try them out. They are a work of art!

 This is the first BumGenius we've purchased, but I have one that a friend gave me and really liked it. I was moved to purchase them because of the great sale they have going on right now. Bum Genius 4.0 are Buy 5 Get 1 Free! That brings the price to $15 each!!!!

I really can't use enough exclamation points to describe my excitement. If you don't cloth diaper then you probably think I'm a little nutty, but using cloth diapers has been one of the greatest sources of savings for our family in these early years of having children. It's a modest upfront investment ($200-500 depending on your likes) but you can them pay nothing on diapers until your 'little' is out of diapers.


"Well, Molly, if they're so great, why are you spending more money on new ones?"

Good question.

Because I have Two Under Two. I thought Mogi would be potty trained by now and out of cloth diapers, but we're still in the process and its not going to be done tomorrow. He does go through a lot less diapers than Aj does, but they still get used and we didn't have enough to make it from wash day to wash day. There's nothing worse than needing to get your child dressed only to realize the diapers are still wet in the wash and there's no clean ones to use. Since this has happened or nearly happened several times lately, I decided to buy more. Also, AJ is a big wetter for her size and I bought some Cotton Babies Diaper Doublers from Nicki's to use with her prefolds and covers. I've been having to change her diaper so often that its become a hassle. And I can't imagine she like sitting in a soggy diaper!


Do you have questions about cloth diapering? Something that's preventing you from taking the "leap"? Share them on hear and I'll try to answer them. We'll also be having a series over at Muddy Mamas in the next few months on cloth diapers, so if I can't answer them I know one of the other cloth diaper Mamas can!

+++ I'm not receiving compensation in any way for this post. I'm just a huge fan!++

Monday, March 28, 2011

A Little Encouragement

It's such a great thing to hear that something I've written on here has benefited someone else. So, when Stretch Your Savings wrote a post on how helpful my post was, I was floored. THANK YOU

By the way, she has a wonderfully helpful site on saving money, couponing and all kinds of deals. Go check her out!!

http://stretchyoursavings.blogspot.com/2011/03/just-inspiration-i-needed.html

Wednesday, March 23, 2011

Put Your Bread Machine to Work

I keep having this recurring conversation where someone compliments me on my bread, then asks if its homemade. I answer, "Yes, I made it in the bread machine" and they reply "I have one of those, but I never use it."

The first few times this happened, I had to retrieve my jaw from the floor. But now that it's happened a ka-jillion times I've grown used to it. Well, I'm still a little curious why anyone would leave a $100 item sitting around unused. I mean, I get it if its "not your thing" but sell it already and get some cash!

Anyway, I'm writing this post for everyone out there who has a bread machine but rarely or never uses it because it takes too much effort and for those contemplating buying one. I thought I'd share how I keep the process simple. Bread has been getting more and more expensive in the last few years and although store bread usually has a good texture, its hard to find something with a good texture and great taste.

1. Unearth your machine and place it somewhere convenient and usable. If its buried you're never going to dig that bad boy out of a cabinet and find counter space for it. I keep mine on top of the deep freezer in the corner of the kitchen.


2. Get one or two recipes and use them repeatedly so you don't have to over think the process. Most machine manuals come with recipes that fit the size of your machine. I'd recommend a white bread recipe and a pizza dough recipe. When you're comfortable with these, you can swap some flour to make 1/2 wheat bread, cinnamon bread, or garlic Parmesan pizza dough. The possibilities are limitless.

3. Get all your ingredients in a convenient location so you don't have to spend a ton of time searching for them.


I keep my refrigerated items (yeast and butter) just inside the door and even cut some butter into the 2T. that I need so I don't have to dirty a knife.
  

I put the dry ingredients into smaller containers and even keep a measuring spoon and cups I need just to be used for bread. Then I keep all this in one container so its easy to grab and use.


I buy bread flour in bulk (25lbs) at S@ams Club and keep it in an airtight container. It actually was from cat litter we bought a lifetime ago but it fits the whole bag and the lid is super sturdy. And I got a smaller container from my mom that fits 5 lbs of whole wheat flour perfectly.


All my dry ingredients are kept just inside the pantry, which is right beside the machine, so I don't have to drag it far.

So when I need to use my bread machine I can do it quickly. And I know that whatever I make will turn out yummy. Lately I've found out how quick it it to make dough and then shape them into rolls, let them rise in the oven and then bake them! i can have hot rolls on the table in less than 2 hours. I'll admit, if you've worked all day away from home and just walked in the door, its not gonna happen. But, you can find time on the weekend and even get the kids involved in shaping rolls and then freeze some for during the week.

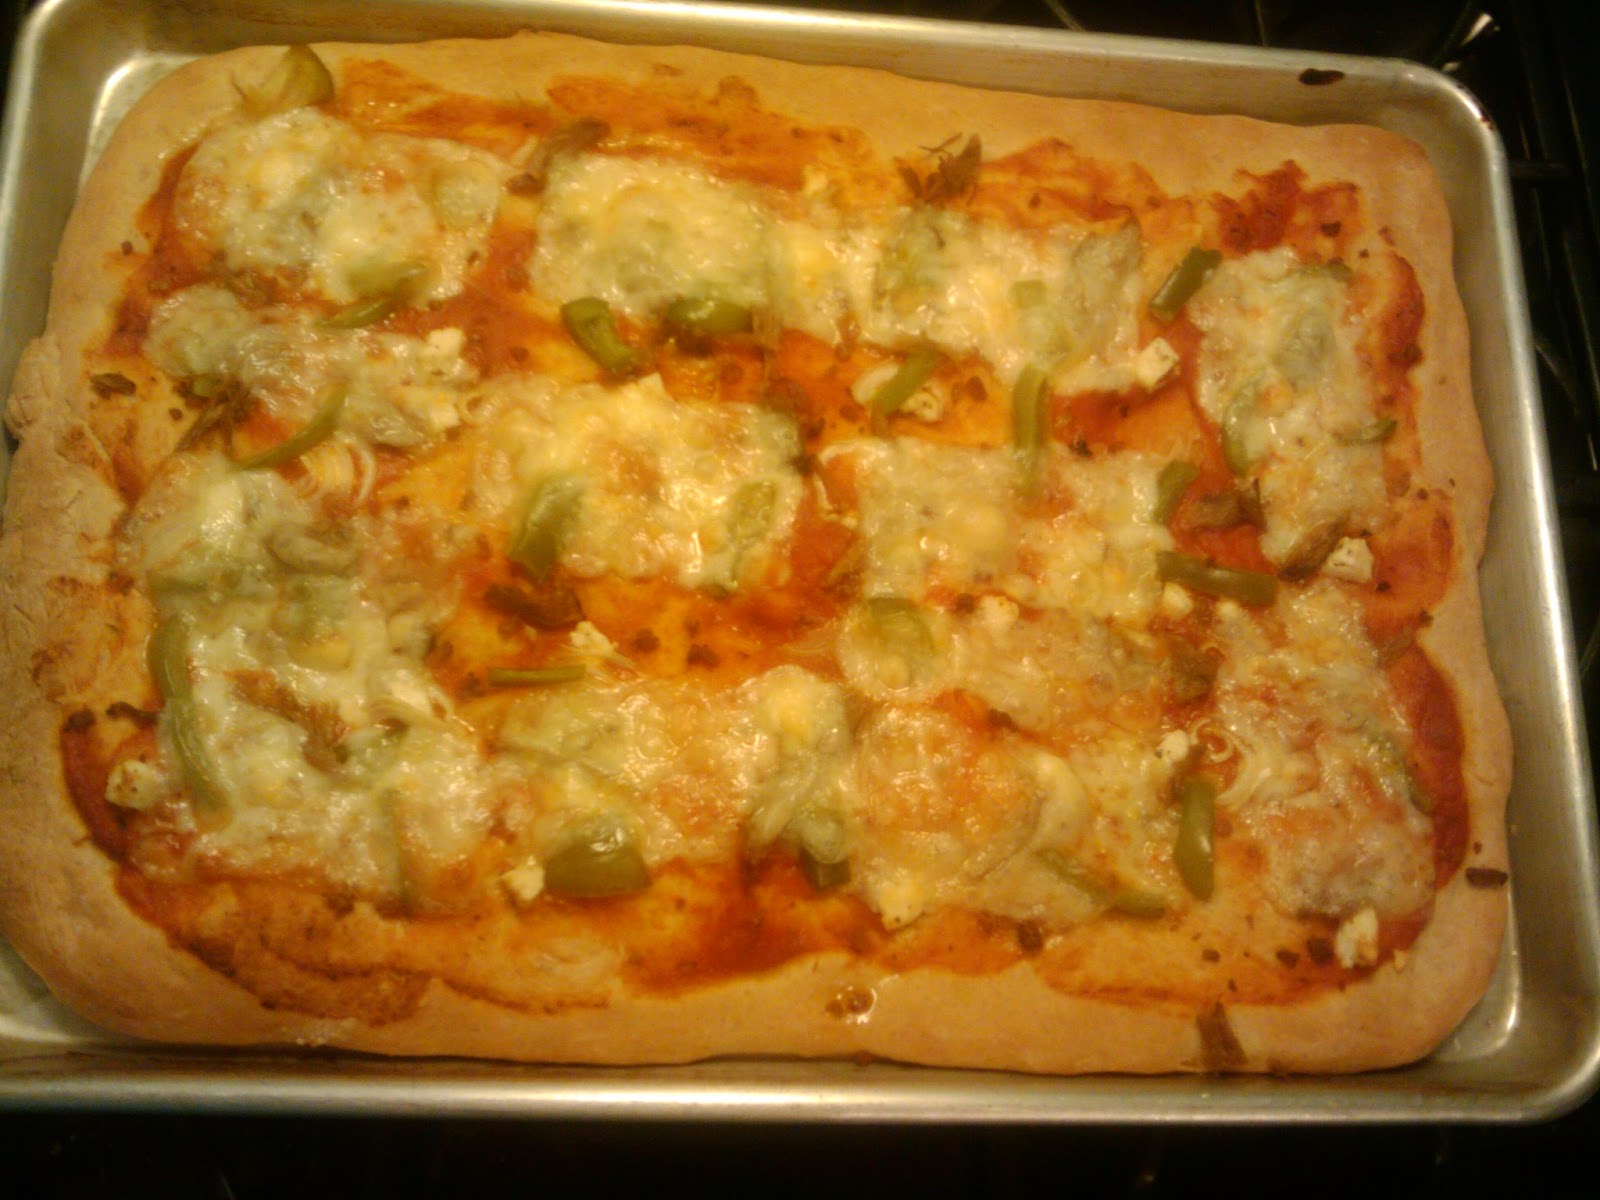
But, my favorite will always been fresh pizza! Here's one topped with onion, green bell pepper, pulled pork, feta and Swiss cheese!

Happy baking :)

Saturday, February 19, 2011

Finding Rest: Pt 1

As a parent, regardless of my love for my children, I need to have some down time and things that I do apart from being mom. I'm learning that in order for me to give sacrificially to my family, I need to be healthy physically, emotionally, and mentally. So, in essence, to make them a priority, I have to be a priority.

In light of that, I thought I'd take a few posts and share some ways I relax, unwind, or just refresh.

And since we've just come out of weeks of sickness, I'm needing some refreshing and rest.
--------------------------------------------------------------------------------------------------------

My friend's had their first child a few weeks ago, so I thought they might enjoy something for his room. My friend shared with me what bedding they were using for the crib and I took some ideas and used that to inspire these.


If you need to fill some wall space in your kid's room, you can save a lot of cash by creating something yourself. You can get the supplies from a crafts store. You'd need a canvas, paint, a pencil, and brushes. If you're going for great quality, you might want to use primer- especially under a dark color. It took a lot of effort to cover the white canvas with the brown paint.

Paint comes in a wide variety of quality and prices. More vibrant colors will be more expensive. So if you want something really bright and beautiful, it will be worth the cost. A good set of brushes are worth buying. You don't have to spend much, but you'll have them to use again if you decide to do more painting.

I usually sketch my design on first in pencil before I paint and then decide which colors to paint in what order. The giraffes I did free hand from the bedding design, but you can always print off and trace anything that inspires you. And for the circles I used various sizes of tupperware containers!

The great thing about doing this yourself is that it doesn't cost much and if it seems "baby-ish" as your child grows, you can paint over it with no great loss!

I couldn't "quit my day job" to paint, but I do find it very relaxing. Of course, I only find time for it while little ones are sleeping because paint and little hands are not my idea of a good time!

I find it very rewarding at the end to step back and see what the outcome is. When I was in my early 20s, I spent some time working in "full-time" Christian ministry and found that because my work didn't have a physical product and outcomes were often unseen, it could be frustrating. In the same way as parents, our work to shape and mold our children can become frustrating if we expect to see "results" that don't happen in our time and ways. I think this kind of "tangible" hobby helps me have an outlet for creativity and the God-given desire for a "product". And, at the same time, allows me to be a better mom because I don't feel the need to turn my kids into my project. I can allow them to learn and grow in their time and in the way God has designed them. And I can have the ability to show them more grace when they "fail" to behave in the way I expect them to.

If you're not "Type A" like I am, that may not make much sense. But, I know we all can relate on some level.

Sunday, July 25, 2010

Never Been Prouder to be a Cloth Diaper Family

During a summer as hot as this one, I'm sure glad I can put some of this solar heat to good use!

Friday, July 23, 2010

Nursery Art- Crafty on the Cheap

I decorated a canvas this week for the nursery door that has a more co-ed theme. The previous canvas had Mogi's name on it. Not sure how AJ would feel about that : )


I saw a similar canvas online and basically copied the idea. It took me four days to get it done with a very curious 13 month-old "underfoot", but it was worth it! I had thought of adding a Bible verse to it, but my handwriting isn't the steadiest and I would have been really bummed if that "messed" it up!

Did I mention it was cheap? (A recurring theme in our life!) The canvas was one that I've had for 10 years, literally, and repurposed multiple times. If you have to buy one they run $7-8 at the art store. I splurged and bought some new brushes that were $4, but I had a 40% off coupon, so $2.40. And then I had the green and brown paint from other projects. The green was good quality acrylic for painting (~$4) and the brown was craft paint. The price tag on it actually says $0.57! And the white paint was also craft acrylic and was $1.27.

Buying something like this in the store or online is likely $25 or upward. And I'm no artist, so if I can do it, anyone can. I painted on the green on Day One. Day Two I drew the cross outline in pencil, erasable, and then painted the white keeping an edge within the cross where the brown outline would be. Day Three I did the brown stripes, the hardest part for me. I'd never attempted zebra before, but I happen to be an animal print fan, as you can see from the picture, and had a few samples to draw inspiration from. One Day Four I added the brown dot edge and touched up the stripes with a super small brush.

Oh, and may I recommend 3M's picture hangers? They're sold almost everywhere, and while pricey, well worth it. This will hang on a solid wood door that I don't want to mark, and I've also used them on the plaster we have on our walls. Basically its a tab with sticky on one side and velcro on the other. With two of them back to back, you peal the adhesive, stick it on your artwork and then press it against the wall. It bonds in 30 seconds and after it sets for an hour you can peel the two halves if its crooked and needs leveled. I'm probably no explaining it well, but if you don't want a hole in your wall or any damage, check it out!

And I've been feeling the need for some projects of the creative nature, so they'll probably be some posts about those later, if I get around to starting them!

Wednesday, July 21, 2010

Crib Rail Protector

A while back Ramogi had put a few markks on his crib railing after naptimes and before we'd come in to get him. They were teeth marks, small ones. I looked at rail covers and only saw the plastic ones, which were ugly and didn't seem like they'd stay on or do a while lot of good.

A few weeks went by and I hadn't done anything. Then two days ago I walked in after a nap and saw this.

A massive chew mark on the top and side of the rail! Well, after seeing that I jumped online to find some way to keep him from tearing up the crib. Right away I found some tutorials for how to make your own. You buy a few yards of fabric to match the room, buy some quilted padding to go underneath, sew it up with ribbons and tie it in place. It looked simple enough, but I knew the reality was that it would take me forever to get around to sewing.

So, I kept looking.

And then I happened upon someone selling a tutorial for a no-sew fleece cover. One look at the picture and I didn't need to pay to figure out how to do it. The pictures aren't great, but here's how it turned out.


Here's what I did:
1) Found something to use as padding. We use cloth diapers and I have a ton of them, so I doubled some up to use as a pad.
2) With the padding included, I measured around the rail (and the padding).
3) I also measured the inside length of the rail, across the front and the side. The side of my crib is 27" and the front is 57". With the padding on my side rail measured 10.5" and the front 7" (The front is skinnier).
4) I included extra length to have room to make ties, double-knotted. Depending on how you cut the fleece, you may or may not have stretch and give to your fabric. It's probably best not to have stretch so that it stays the way you intend it. In that case, add 5-6" per tie for 10-12" of extra fabric beyond your measurements. So, my side rail pieces were each 27" x 21" and the front was 57" x 16". (I should have gone longer on the front rail, but it ended up working.)
5) I used some masking tape to hold the diapers/padding in place, cut out my pieces and tied them on. I had it all done in a short time and for cheap. The diapers were no cost (and you probably have something around your house you don't use that can work as padding) and I used just over a yard of fabric. The fleece was $6.99/yd and on sale for 30% off. So my grand total was a bit over $5. Yay for cheap!!

The ties allow you to attach toys or any other things you may keep in the baby's crib. BTW, I had toys all up and down the rail before he "took the bite" and it didn't dissuade him! I've learned my lesson. With AJ I'll attach a crib protector as soon as she's standing and BEFORE she leaves her mark!

I came in today after both naps and found wet spots where Mogi had been teething the rail, but on the protector, not the wood!

Saturday, July 17, 2010

Kids Car Seats

So I found would I thought would be a great deal on the Sam's Club website: a convertible carseat that normally sells for $159 selling for $95, shipping included. I read the reviews, most seemed good, so I made the purchase. The seat is a Safety First Alpha Omega Elite.

I thought it would be great to use for AJ. It had a girly, plaid design and fit from 5-100lbs, rear-facing, forward-facing, and booster seat. I bought it, it came in the mail and it was adorable. But, I decided that before I had it too many days I should try installing it in the car. See, a couple reviews said they couldn't sit it in their car. Honestly, I didn't think this would be an issue. I mean, I drive a mini-van. Everything fits in a mini-van, right?

Ugh, apparently not! I'm pretty good with the whole carseat installation thing. So, its not like it was the person who has never seen one trying to put it in.

I read the directions carefully before beginning and then headed to the car for the install. I got in okay, but it surely wasn't leveled. When I leveled it, I either had to push the front passenger seat WAY up, so that no one would be able to use it, or I had to lay the seat down, nearly horizontal. That would have made the third row unusable. I even tried removing the base, which is recommended for "narrow" vehicles.

I showed it to my husband to see his reaction, and he agreed that it wasn't a good choice. So, sadly, I boxed it back up and headed to Sam's to get my full refund.

We've decided to put Mogi in our "extra" seat and use his for AJ. The extra is a Cosco Scenera. functional, just with zero butt padding, so we'll need to find a way to soften it up if he'll be in the car for any time. It's likely that at his current rate and growth curve, he'll outgrow the 40lb weigt limit on the Scenera by his second birthday. Unless we have to make a change before then, I guess we'll buy a belt-positioning booster for him, which are a lot cheaper anyway.

You may wonder why I don't use the Scenera for AJ since butt padding isn't an issue a 10 lb newborn needs. That would lead me to why the is no longer Scenera our primary seat. It has high sides, as opposed to our Eddie Bauer Deluxe Convertible Carseat. The Scenera was very difficult to get a sleeping infant our of without waking them.

We never made the investment in an infant car seat. And no knowing if there will be other infants after AJ to use it, I'm not sure its a good investment at this point either... The idea of spending the same amount of money on something that only rear-faces up to (maybe) 35 lbs versus something that has three stages and lasts up to 80lbs is hard for me to agree to. And having back problems, not having the removable seat means I can't take it out and lug it around, which is a good thing for me.

Any thoughts on a great carseat? Have one to share about that's within a smaller budget, say less than $150. What kind of car do you drive?

Just a random last minute thought, but... We've committed to keeping kids rear-facing as long as we can given the seat's weight limit. Lots of kids get turned around at 22lbs, which although legal, isn't in anyones best interest. Maybe kids get turned around too soon because the covertible seats are just too big to fit well in cars? Any thoughts? Comments?

Friday, May 28, 2010

Things we'll reuse with AJ

Stuff I already have that I'll be able to reuse:
- Breastpump. A Medela electric double pump that made it possible to bf Ramogi twice as many months. Highly recommended and worth the bucks for anyone who wants to bf and have a life that requires them to be away from baby at times. Purchase it from Day 1 and get help from a lactation specialist if needed. Just my two cents!
- Moby wrap. This is supposed to be one of the easiest to use and bf in. Plus, its really soft and comfy, and can be used by different people with out resizing.
- Swaddle. If Dos is anything like Ramogi, we'll be using the variety of SwaddleMes we own for the first four months at every nap and all night long.
-Convertible Car Seat. Ramogi ourgrew an infant seat at 6 months, so we have two convertible seats and we'll use one with Dos. We may end up buying a second Eddie Bauer Convertible at some point because its such a great seat and the other is pretty basic.
-Infant Swing. We used this a lot with Ramogi, especially in the first three months. After that he'd just about grown out of it.
-Infant Seat/Rocker. This was a great find on consignment for $5. Baby can be straped in and then we can bring him/her up to table level when we eat or just for lounging around.
- Cloth Diapers. We bought cloth diapers and use them with Ramogi and with the new baby. We have 8 Blueberry diaper covers and 3 sizes of prefolds, 2 dozen of each. We also have 7 Haute Pockets which are as simple as a disposable. We mainly use them for babysitters and taking to the church nursery.
- Toys. Over the next few months I plan on putting away more of Ramogi's toys that will be good for the new baby. There's lots of stuffed/stroller/car seat toys that are out but he doesn't play with anymore. That way if he sees Dos with them he won't be as inclined to take them, I hope!
-Pack N Play. Like I said in a previous post, we ahve two of these and the one with the bassinet we'll use in our room when baby is born and then as a crib until Dos hits the weight limit.
-Infant bath tub. Our current tub is big enough for Ramogi, but has a recline for newborns that can be set inside. We'll use this for both of them as long as possible since we only have showers in our house, no baths!

Lots of our things have come from consignment sales. As long as it is washable/disinfectable and not a safety device, I usually purchase used. By safety device I mean car seat. Most of Ramogi's toys and clothes have come from consignment and several big ticket items (Pack N Plays, strollers, monitor). It's saved us A LOT of cah that way. If we have to buy new, I research which item I want and wait for it to go on sale.

Friday, February 5, 2010

Meal Planning for Time Saving

"Do not work for food that spoils, but for food that endures to eternla life, which the Son of Man will give you." John 6:27 NIV of The Bible

My friend Ashley over at Clay Woman shared some ideas about meal planning and grocery shopping once-a-month for time saving. While I had been doing once-a-week shopping, she spurred me on to spend a few more minutes thinking about it and less time in the grocery store. I found a few things helpful, so I thought I'd share them.

My goals were
1) Not have a house devoid of food or supplies and be asking my husband yet again, "what do you want to eat? I have to order pizza/go shopping."
2) Plan meals that were simple to cook, healthy, low-budget, lasted for multiple meals and tasty.
3) Never go to fix a meal only to find out I had fogotten to buy half of what I needed to fix it!
4) Minimize our overall food budget, both home-cooked and eating-out.

What works for me:
1) I print out these handy calendars from Calendars That Work. You can pay a small fee and get all that you want or go back every few months to get another (or make something similar yourself).

2) I then add three sections to the workspace. One to keep track of money spent on groceries, a second for money spent eating out, and a third for the meals that I will fix (and buy groceries for).
  • I start my monthly calendar before the month ends, adding which meals I will make. Lots of these will be replicated from other months.
  • When I go grocery shopping, I add my expenses to the calendar and where I spent the money.
  • After eating out, I add the location and total cost to the calendar. This helps curb my desire to eat out when I realize how recently we last ate out. (We try to go out for lunch, this is much cheaper and easier to bring along our son as a family outing.)
3) I have staples that I always buy when they run out, not just when they appear in a recipe. This list wil differ for every family. Here are some of mine: Spices (black pepper, salt, crushed red pepper...), minced garlic, milk, butter, lunch meat, lunch cheese, crackers, coffee creamer, coffee, cereal, flour, brown sugar, vinegar, baking soda, dish detergent... you get the idea.

4) I fix each meal to have left-overs. I aim for 6-8 servings from each meal. This means I typically cook 10-12 times a month! Lunchs are usually leftovers or sandwiches. If you have a husband who won't each leftovers, I have no help for you. Maybe he wants to do half the cooking? All I can say is leftovers are everyones friend, at least the second time. By the fourth time, maybe not. But, make things that freeze well and when you're sick of them, freeze tham and bring them out in a few weeks!